I am a Design Team member for Tsunami Rose Designs.
This month we have been working with the
I like these papers so much that I decided to make a few "extras".
I made a step card for my DT entry this week and it got me searching online for
other variations other than just the
Centre and Side Step Cards
. I found this Trifold Shutter Card Template on
Sandy Allnock's website -
it was SO easy to use and understand.
The "new" template give you plenty of room to write a personal note on your card.
(Thank you Sandy)
So here's my photo "recipe card":
This is the basic layout for the base of the card. I am not going to give you all the dimensions since it is clearly outlined in Sandy's blog post.
Top view of base to better understand the folds
All of the papers used were "aged" with this brand new little
I just got today and a
Tim Holtz Old Paper Distress Ink
(this is turning out to be one of my 'go to' inks - I've been using it so often).
I attached all of the designer paper with my ATC being careful to try to line them all up
While the card was laying flat I added some 1/8" scor tape around the two
1 3/4 x 1 1/4 panels
and added some clear glitter
(you know a girl can NEVER have enough glitter and
I've had this glitter for so many years that this is about the end of it
(time to look into some of the new and improved that it now available).
I've had this glitter for so many years that this is about the end of it
(time to look into some of the new and improved that it now available).
I recently got this Spellbinders Shapeabilities
Die D-Lites Flourish Trim
and this is the first card I've made with it.
I learned quickly that it is much easier to use if you put a layer of
waxed paper
between the die and your cardstock before embossing and cutting.
I attached some generic clear "bling" rhinestones from my stash, and some decorative "corner" flourishes in a matching color (from Recollections) and positioned my sentiment and mounted it.
The flowers were cut with my Cricut George and Basic Shapes cartridge at 1", using more paper from Daisy's collection.
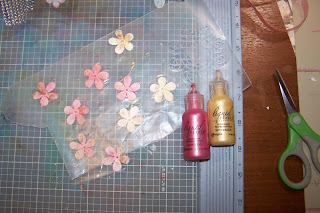
I watered down some Flamingo and Buttercup Liquid Pearls from Ranger and "painted" the flowers to give them some shine and dimension.
I cut the leaves from scraps of green (leftover from all of the St. Patrick's projects from the last week).
Of course a little rhinestone was added to the center of each one after mounting.
I enjoyed showing my creative side to you.
Have a beautiful and blessed day!
Trudy
Materials used:
Cardstock: Best Occasions Starter pack Cardstock (off white)
Designer Paper: Tsunami Rose Designs Life Abloom Printable Journal Set
Flowers: Cricut George and Basic Shapes Cartridge cut to 1"
Leaves: Spellbinders Shapeabilities Foliage Die
Decorative Trim: Spellbinders Shapeabilities Die D-Lites Flourish Trim
Ink: Tim Holtz Old Paper Distress Ink
Liquid Pearls (Flamingo and Buttercup)
1/8" scor-tape
clear glitter (in my stash forever)
Recollections adhesive rhinestones
Paper distresser
Challenges I wish to enter with this card are:
Fab 'n' Funky - #162 - Add Sentiment
Word Art Wednesday - #71 Anything Goes
Tsunami Rose Designs - #11 Step Card
Scrap Creations - Favorite Embellishment
Oldie But A Goodie - Feeling Floral
Through The Craft Room Door - Anything Goes
Aud Sentiments - Girl Power
Cute Card Thursday - Anything Goes
Forever Friends - Forever Flowers
Moving Along With The Times - Spring Is In The Air


This is a gorgeous design and I love how you have brought it to life with your wonderful creative style.
ReplyDelete{I would love you to take part in my 500 Follower Give-away.} Hugs Desíre {Doing Life}
I did, I did!!!
DeleteCongratulations to you!!!
What a gorgeous card and great tutorial! thanks for playing along at Fab'n'Funky challenges this week hugs Judith x
ReplyDeleteThis is gorgeous, and thanks for sharing your folding technique with us. We're so blessed to have you join us.
ReplyDeleteBlessings to you,
Karen
Word Art Wednesday
Wonderful card, beautiful details. Thanks for joining us this week at WAW.
ReplyDeleteGorgeous card! Thank you for joining us at AUD Sentiment Challenge this week:)
ReplyDeletebeautiful, beautiful card! great design for the folds and i love all the details you used.
ReplyDeleteBeautiful card brilliant design. Thank you for joining us at Aud Sentiments challenge good luck Ginny ♥
ReplyDeleteThis is a fabulous tutorial! Thanks for playing with us this week at TTCRD. Please send me your e-mail if you still want to be a GDT
ReplyDeleteHuggs
Sandi
Sandi - I sent you an email message - but just in case: stickyfingersart@yahoo.com
DeleteThanks!!!
Beautiful card - gorgeous design papers and fabulous card fold.
ReplyDeleteThanks for playing along with us at An Oldie But Goodie and MAWTT.
Good luck.
Debs xx
Hi Trudy, ooh that's just lovely! Great shape and such pretty colours.
ReplyDeleteThanks for joining in with us this week at MAWTT.
Sarah
Gorgeous card!
ReplyDeleteThanks for joining in my 'Feeling Floral' challenge at Oldie but a Goodie!
Helen x
Absolutely beautiful card and love your gorgeous flowers. Thank you for joining in the Forever Friends Monthly Challenge. Donna x
ReplyDelete