Monday, April 29, 2013

Faith, Hope and Love (with LOTS of layers)

Check out all the layers today over at 
 Challenge #60 - Anything Goes/Lots of Layers

Here's my 6" x 6"  inspiration card using a


Supplies and Products Used:

  • Colorbok Pink 12 x 12 card stock
  • Black card stock - scraps from stash
  • Bugaboo Image 2337 Faith - Beautiful Blocks
  • Water Color Pencils
  • Petaloo Flowers
  • Liquid Pearls Flamingo
  • Ribbon from stash
  • Sisix Decorative Flourish Dies
  • Spellbiners Flourish Trim
  • ATG
  • Zip Dry Glue
  • Foam Tape
Thanks for visiting my blog today.  

Wishing you a beautiful and blessed day! 
 Trudy

Love To Create Challenge - Guest DT


And this is how we celebrate Christmas Florida Style!!!

Hey Ya'll  
I'm so happy to be a Guest Designer today for
new challenge #63
The Theme is Punches and Dies.

I used a Dr. Digi House of Stamps image


 Inside of card


Supplies Used:


  • White card stock (12 x 12) from stash
  • Colorbok 12 x 12 Foil Paper
  • Colorbok 12 x 12 Glitter Paper
  • Spellbinders Nestabilities A2 Matting Basics A and B sets
  • Cricut George and Basic Shapes (oval)
  • Friskars Scalloped Punch
  • Friskars Ribbon Punch
  • Memento Bahama Blue Dye Ink
  • Merry Christmas Stamp  - Stampabilities
  • Turquoise Glitter
  • Red Glitter
  • Foam Tape
  • A T G
  • Ribbon from stash
  • 1/8" Scor Tape 


Instructions:

I modified the directions for a center step card to make it 6" wide to accommodate the large image I wanted to use.  Punch 2 pieces of  blue glitter paper on both sides to fit side panels, cut one additional 6" wide (for bottom of card front).  Punch 2 pieces of white glitter paper to fit inside of the 2 blue punches pieces, cut one additional 6" wide (for bottom of card front). Fussy cut a "wave like" pattern in blue glitter - 6" wide.  Cut 2 ovals with Cricut (1 - 5 1/2" and 1 - 5") add turquoise glitter to the edge of the larger piece.  Trace 5" oval on to blue glitter paper and hand cut.  Tape to the 5"piece of card stock.  Attach to larger 5 1/2" oval with tape.  Color digi in your choice of medium (I used Spectrum Noir markers). Using 1/8" scor-tape on surfboard lines, add additional turquoise glitter and a few drops of red glitter to the top of the sandals.  Santa's bag was cut out of an onion bag, tied with red ribbon and glued to the back of the image paper. Attach to ovals using form tape (lots).  Merry Christmas sentiment was stamped with the Bahama Blue ink, cut to fit with A2 dies, matted on a larger piece of white card stock cut with A2 dies, and trimmed with red glitter which was attached with the scor-tape.  Attach waves, then scalloped border then sentiment block to the bottom front of the card.  Cut foil paper to size for inside of card.  The Florida Style sentiment I printed using a Paint Program, cut and layered with 2 additional pieces of foil and white card stock.  Trimmed with scor-tape and glitter to make an additional "border".  Attach to base of inside of card with ATG.


Thanks for stopping by today - I so appreciate it!

Have a wonderful day and don't forget to check out all the
for some inspiration!!!

Trudy

Wednesday, April 24, 2013

You Are In Our Thoughts and Prayers - Sympathy Card


This beautiful image 
(Vintage Calla Lilly 6 x 6 printable)
 is another wonderful design by 
Daisy Collins at 
which you can purchase here.


All of the other papers are WINNINGS from 
(thank you Archana Joshi - they are beautiful) -
and the customer service is
 EXCEPTIONAL,
 FAST shipping and 
terrific product. 
 I really can't say enough good things about my first experience with this company.
I will definitely be using them often!


I want to give credit for this exceptional layout to 
Henrikke at 
for the great tutorial on
 Folding Cards.

I cannot begin to tell you 
how much I appreciate artists 
who share their techniques 
with newbies like me who have
 little or no idea what they are doing -
 that simply have a love of art and creating. 
Thank you Henrikke, for sharing!!!  


Supplies Used:
6 x 6 Vintage Calla Lilly from Tsunami Rose Designs
Simple Stories 6 x 6 (Documented) from Crafty City
Glitz t" Paper Pack - Pretty In Pink from Crafty City
8.5" Smooth Card stock (Craft) by Colorbok
Copper Parchment Paper - South Worth
Grand Calibur
Spellbinders Nestabilities Wavy Rectangles
Cuttlebug D'vine Swirls Embossing Folder
Sissix Medium Decorative Flourishes Dieset
Hero Arts CL 475 With Sympathy Stamp Set

Products Used:
Tim Holtz Distress Stain - Tarnished Brass
Ranger Liquid Pearls - Buttercup
Aleen's Tack Dot Singles
Tim Holtz Distressing Tool
Tim Holtz Blending Tool
Inks:  Tim Holtz/Ranger Distress Ink (Vintage Photo and Old Paper), Stampabilities Pigment Ink Pad (Brown) Color Box Pigment Brush Pad (Gold)
ATG
Foam and Clear Tape


Challenges I'm entering with this card are:
Scribbles Designs Challenge - shaped or easel card


Tuesday, April 23, 2013

Tsunami Rose Designs Challenge #17 - Color Challenge


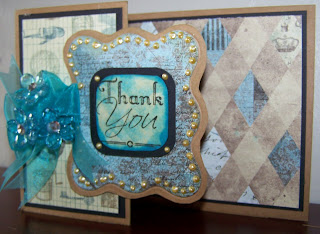
First of all I want to thank Fresh and Fun for the Z-fold tutorial that I followed to make this card.


 Tsunami Rose Designs Links 

Products Used:
Tsunami Rose Yesterday's Commodity Paper Pack
Grand Calibur
Spellbinders Nestabilities Wavy Rectangles

Ink: Tim Holtz Distress Ink (Old Paper) Memento (Bahama Blue)
Kraft Paper
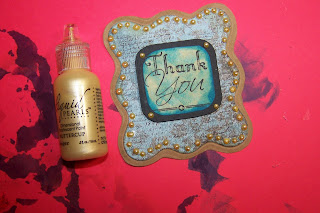
Liquid Pearls (Buttercup)
Home made stick pin
Sheer ribbon from stash


Monday, April 22, 2013

Tammy's Scrapin' Corner Challenge # 59 - Anything Goes - BLING IT UP!

Happy Monday Morning, y'all!

April is Prevention of Cruelty to Animals Month. 
 The ASPCA had adopted the
 orange ribbon with a paw print as their symbol
 to bring awareness to this horrific cause 
and I've used it on this card to show my support.


Inside of card

Outside of card


Time to check out the new challenge at Tammy's Scrapin' Corner

This week's Sponsor is Stamp Fairy.
You can win some free stuff from them
by entering the challenge and
we all know that free stuff is always wonderful!!!

This is the Herb with Ribbon digi which you can purchase here:


Tools and Supplies Used:
  • Grand Calibur 
  • Spellbinders Shapeabilities Die D Lites Medallion Four
  • Spellbinders Nestabilities A2 Matting Basics A and B
  • ATG
  • Friskars Decorative Border Punch
  • The Paper Studio A2 Medium Polka Dots Embossing Folder


Products Used:
  • Stamp Fairy Herb with Ribbon #6 Cloud
  • Recollections Purple Passion 4.5 x 6.5 Card Stock Paper
  • Colorbok Card Stock (purple, light purple, white, and gold) ***note that you will need a 12" piece               of the dark purple for your base).
  • Inks:  Tim Holtz/Ranger Distress (Dried Marigold), Color Box Pigment Stamp Pad (Ice)
  • VersiMark Embossing Pad
  • Embossing Pen
  • Embossing Powders:  Recollections Sparkle (Glitz), Recollections Opaque ( Ebony)
  • Ranger Liquid Pearls (Buttercup, Silver Metallic, and Orchid)
  • Tim Holtz/Ranger Distress Stain (Seedless Preserves)
  • Elmer's 3D Classic Rainbow 'n Glitter Pens (orange and purple)
  • Purple Rat tail ribbon from stash
  • Gold Beaded Decorative Trim #162 Gold (Hobby Lobby)
  • Darice Adhesive Backed Acryllic Gems (purple)
  • Zip Dry Glue
  • Foam Tape
  • Scor-Tape 1/8"
  • Design Water Color Pencils ( Vermillion Red, Senna Brown, Tuscan Red, Dark Brown and Orange)
  • Spectrum Noir #EB1 Marker
  • Various sentiments regarding dogs and loving animals from the net


Instructions:

Using the QKR Stampede Concertina Tutorial; thank you Paper Crazy Lady for the "know how" - (it is so appreciated when artist's trade ideas, instructions and inspiration - I'm so blessed to be involved with such a generous group of humans) - cut your purple base as shown in the instructions.  

I'm not going to go into detail on this card, as it was VERY time consuming
(decorating 6 pages with layers and bling and sentiments and all the angles). 
 So rather than bore you,
 I can send you a recipe card, if you wish.
 Just email me and it will be on it's way.

I am showing you some of my PRC (Photo Recipe Card) with some of the steps I used


 Using your punch, cut the border out of light purple card stock

 Determine the size you need your digi to be

 Stamping the clouds - but later decided that they needed to be embossed to show better

 All layers (except the front top layer) will be dry embossed with the Polka Dots folder

Attach rat tail ribbon with 1/8" scor tape

 My very first time using a heat gun (I have been using my stove) OOPS!!!

 Die cutting the sayings I found on the net

Completed panel

Our guest designer this week is 
Guest Designer: CĂ©line

Stop by her blog and show her some love!!

Have a blessed day!
Trudy

Wednesday, April 17, 2013

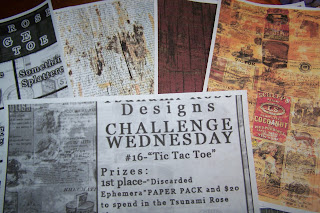
Tsunami Rose Designs Challenge Wednesday #16 - Tic Tac Toe

I hope you are having a wonderful Wednesday!!!

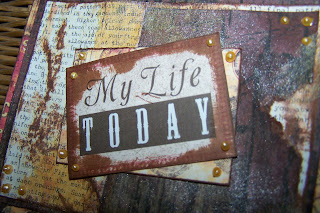
My inspiration card today is from the
 Discarded Ephemera Paper Pack from 


 I used Something Distressed, Grunge Paper, and Something Splattered


 Inside of card


Supplies used;
Discarded Ephemera Paper Pack
Sentiment from Life ABloom Printable Journal 
Tim Holtz Distress Ink (Vintage Photo and Old Paper)
Ranger - Tim Holtz Distress Stain (Tarnished Brass)
Ranger - Liquid Pearls (Buttercup)
ATG
Foam Tape


Instructions:
Front of Card
Using the "label" paper cut to 8 1/2" x 5 1/2" - score at 4 1/4", cut another piece 3" x 2".  Using base as a top fold card.  Cut 5 1/4" x 4" and a 3 1/2" x  2 3/4" layer from "wood look" paper and make a couple of tears in the paper at will.  Cut 5" x 3 3/4" layer from "newsprint paper".  Trim Sentiment.  Distress all of these with ink. Attach base and 1st three layers with ATG.   Splatter with  Distress Stain randomly, spray with water and allow to dry.  Attach sentiment to small label diagonally with ATG and then apply to card base with foam tape. Add liquid pearls.
Inside of Card
Cut  5 1/4" x 4" piece from "newsprint" paper and a 5 x 3 3/4" piece of parchment paper (tear in a few places), crumple the parchment paper a little and  distress both and attach to card base with ATG.


 Tsunami Rose Designs Links 


Monday, April 15, 2013

Spring Has Sprung

That's the theme this week at 
for Challenge #58


There are 2 sponsors this week:  Eureka Stamps and SK Digis

I used the Eureka Butterfly and Sunflower digi for my card.


We have a Guest Designer joining us this week.  
Check out her blog here

.
Products Used:

  • Eureka Butterfly and Sunflower Digi
  • Watercolor Pencils
  • Black, Dark Purple and Yellow Card Stock (ColorBok)
  • Watercolor Paper
  • Liquid Pearls (Orchid)
  • Purple Ribbon
  • Pebbles Pearlescent Chalk 
  • ATG
  • 2 Purple Bling Acryllic Gems
  • Gold Glitter Glue
  • Spellbinders M-Bossabilities EL - 020 Awesome Blossoms Design A
  • Spellbinders Nestabilities Card Creator A2 Matting Basics B


Instructions:
Using black card stock make top fold base 8 1/2"  x 5 1/2"  - score at 4 1/4".   Cut purple 4 1/8" x 5 1/4".  Cut yellow 5 1/8" x 3 7/8" - emboss with folder.  Attach yellow to purple with ATG and add ribbon.  Center and attach the yellow/purple papers to the black base.  Color digi with preferred method (I used watercolor pencils and chalks).  Cut and emboss edges of digi with die and attach to card with foam tape.  Add bows, liquid pearls, gems and glitter (to butterfly).  Enjoy!

I hope you like this little bit of Spring today!

Please consider becoming a follower of my blog.

Most of all - have a beautiful and blessed day!

Trudy